Inkscape: The Spiral Tool
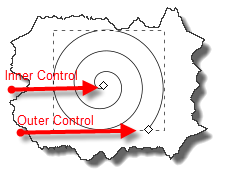
The Spiral tool creates a spiral — a curving line. Inkscape places two diamond shaped controls on the line — one at both ends. The one closest to the center is called the inner control. You can use it to change the size of the radius of the inner most turn. The one on the outside end is called the outer control. You can use it to increase or decrease the number of turns. You can also use the Tools Control bar to modify a spiral.
The Tools Control bar has three fields and one icon.
Turns: The value in this field determines the number of turns the spiral makes. Changing the value is the same as dragging the outer control.
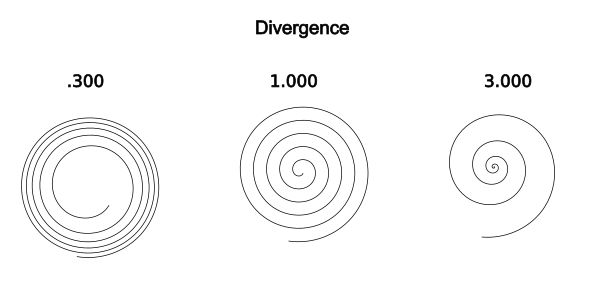
Divergence: The value in this field determines how the distance between each turn is calculated. If the value is one, the distance between each turn is equal. As the value decreases from one, the outer turns become closer together. As the value increases from one, the inner turns become closer together.
Inner Radius: The value in this field determines the radius of the inner most turn. Changing the value is the same as dragging the inner control.
Reset Shape Icon ![]() : Sets the values in the Turns, Divergence, and Inner Radius fields back to their defaults.
: Sets the values in the Turns, Divergence, and Inner Radius fields back to their defaults.
Create Spirals
- Click the Spiral tool or press F9.
- Click and drag on the canvas. Inkscape creates a spiral with two diamond shaped controls.
- Click and drag the outer control to add or remove turns.
- Click and drag the inner control to adjust the radius of the inner most turn.
| Key | Function |
| Ctrl + Drag | Constrains the rotation to 15 degree increments as you drag |
| Outer Control | |
| Shift + Drag | Changes the size of the spiral and rotates the spiral |
| Alt + Drag | Increases or decreases the number of turns |
| Inner Control | |
| Alt + Drag | Adjusts the divergence |
| Alt + Click | Resets the divergence |
| Shift + Click | Resets the inner control to the center |


Leave a Comment